Friday, June 28, 2013

Milk Kefir

Ingredients / Utensils
  • 1-2 Tbsp milk kefir grains
  • 3-4 cup clean glass jar with lid
  • Rubber, nylon or stainless steel mesh-type strainer and wooden spoon.
  • Suitable container with wide open mouth for straining kefir into, and clean sealable bottle to store kefir.
  • 2 cups fresh milk (raw unpasteurized or pasteurized whole milk, reduced-fat, non-fat milk.  DO NOT USE ultra-pasteurized milk)

Method

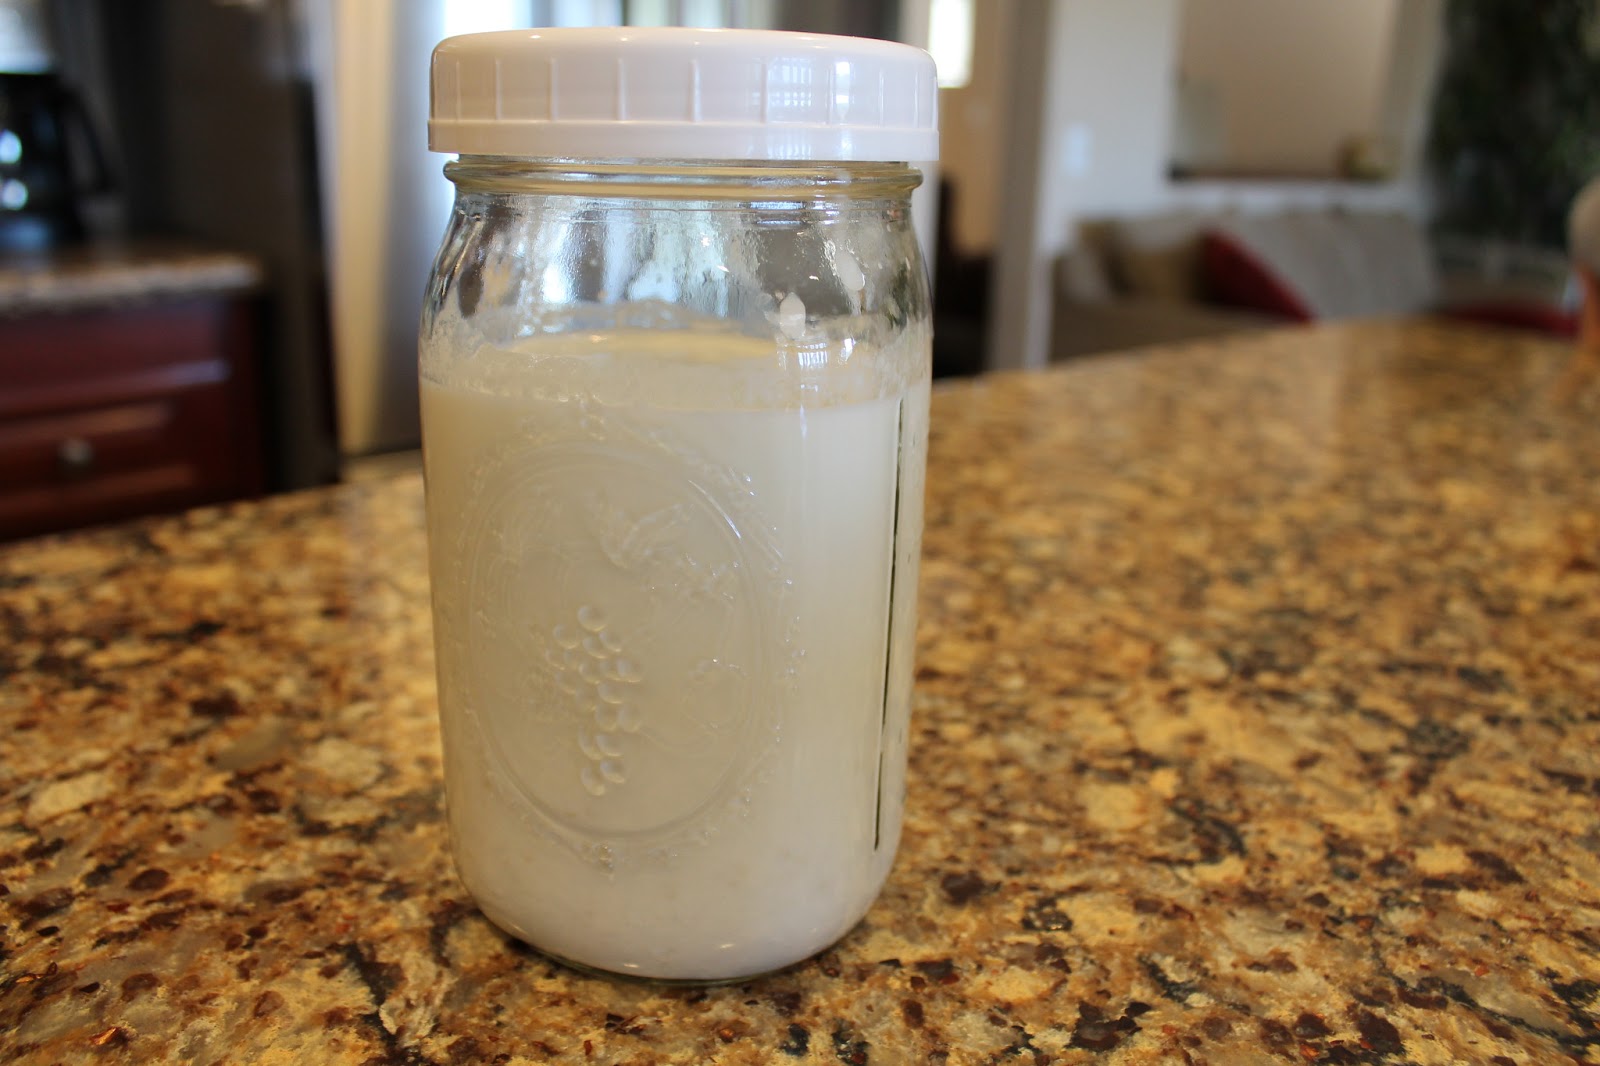
Leave some room on top to
allow for expansion.
  1. Place fresh kefir grains in clean glass jar.  We continue to brew our kefir with the excess grains but others recommend that you remove them.
  2. Add fresh milk, gently stir contents, place a lid on the jar and let stand at room temperature for 12-24 hours. Stir and taste it often. It should taste a little sour. 
  3. Pour contents into a strainer and strain the kefir into a suitable container to separate the kefir grains from the liquid-kefir.
  4. Wash the fermenting jar and reuse the kefir grains for a new batch by repeating the whole process. I generally wash the jar once a week.
  5. What you've strained is kefir, also referred to as Liquid-Kefir. Store the liquid-kefir in a clean bottle and seal the bottle airtight.
    "Kefir may be consumed right away, or better yet, store in a sealed bottle and refrigerate for a day or two and serve chilled. Another option is to ripen liquid-kefir at room temperature for a day or more, preferably under airlock. It can then be refrigerated for longer storage or served as you wish. 1 to 2 days storage in the fridge or ripened at room temperature improves flavor and increases nutritional value. Vitamins B6, B3 and B9 [folic acid] increase during storage, due to bio-synthesis of those vitamins mostly by yeasts of kefir grain organisms."
It's done!  See the air pockets towards the bottom?
If you prefer a thick, creamy kefir, then stir it during the first ferment (step 2 above).  I stir it once about half way through the fermentation process.

For coconut milk kefir, use a can of coconut milk and 2-3 Tbsp of grains. Your grains do prefer animal milk. To keep your kefir going, you'll need to do one of the following:

  1. Refresh your grains in animal milk every 2-3 weeks. Rinsing in between with filtered water, never tap.   OR
  2. Your grains will only last for about 3 months.  Have a friend or neighbor provide new grains when yours die. 
Note that you'll need to make a few batches before your new grains will adapt to coconut milk.


For more information visit http://users.sa.chariot.net.au/~dna/kefirpage.html

This is my favorite way to enjoy kefir, besides smoothies: http://www.culturedfoodlife.com/destination-kefir-breakfast-pudding/


Thursday, June 27, 2013

Lacto Fermentation


I love wide mouth mason jars. They have so many different uses. Here you see them used in lacto-fermention.


The green beans were crunchy. I used 1 tsp black tea and some bay leaves.
The pickles are not mushy, but still could use more crunch.  I added a pinch of black tea and some bay leaves.

The sauerkraut turned out fabulously crunchy!  It was so good, I ate half the jar.  I think what made it so good was the cooler temps last week.  When I made kimchi during a heat wave, it was mushy in texture.
I've discovered a few tricks of the trade:

  • Keep the temperature in the 60-75 range.  Veggies get mushy in hotter temps. 
  • Remove all oxygen. 
  • Weigh down to keep veggies submerged under brine. 
  • Loosen lid once or twice daily to release pressure. 

I use a Jar Sealer along with my Food Saver to create an oxygen-free environment.  This step is not necessary if you don't mind some kahm yeast once in a while.  It's harmless and should be scrapped off as soon as possible to prevent change in taste.

To make crispy pickles, add any of the following:
  • Grape leaves
  • Oak leaves
  • 4 bay leaves, fresh or dry
  • 1 Tbsp cloves
  • 1 Tbsp black tea


I found these glass candle holders at Target that fits perfectly inside a wide mouth mason jar.  They kept everything submerged under the brine.  It's a steal for 99 cents!


Lacto-Fermented Salsa!

Kombucha

I like to do the continuous brew method.  My brewing vessel is a 3.8 gallon glass beverage dispenser with plastic spigot.  I clean out this container about once a year.

When you're not yet ready to start brewing, just leave starter culture in a glass container at room temperature, making sure that the SCOBY doesn't dry out.  When there is too little liquid, add enough water or sweet tea so that SCOBY stays submerged.  You potentially can leave it for years like this.  I've heard of someone who kept it in a basement for 15 years and was able to revive it.  When the culture goes dormant for a long period of time (months, years), the yeast will need some time to wake up.  Meaning the first few batches will be flat, not fizzy.

These instructions are for a 1 gallon container.  You'll need:

  • SCOBY with 2 cups of liquid starter culture (about 20% of total)
  • 3 quarts of filtered water
  • 3/4 cup sugar (never use honey)
  • 1/4 cup of loose tea or 5-7 tea bags (use white, green, black tea or any combination)

 Instructions:
  1. Put SCOBY and starter liquid in brewing container.
  2. Heat up 2 cups of water and steep the tea for 10-15 mins.
  3. Strain off the tea.
  4. Add sugar and stir to dissolve.
  5. Add remainder of water to make 3 quarts of sweetened tea.
  6. Make sure tea is cooled to room temperature before pouring into the brewing container.
  7. Cover with cut-up old tee shirt and secure with a rubber band.
  8. Allow anywhere between 3 days to 2 weeks to ferment.
  9. Taste periodically until desired sourness is obtained.  Pour Kombucha into bottles with tight fitting lid.  Leave at least 20% liquid in the brewing container to make the next batch.
  10.  Let bottles sit at room temperature for a second fermentation.  I like to leave it for at least 2 weeks.  I've left it for as long as 14 months and several bottles turned to vinegar, but the rest were absolutely fantastic!


I got my bottles and lids from a company in Cerritos. These things costs a lot to ship, so it's nice to be able to pick it up locally.

This Kombucha Balancing Act article is very useful for trouble-shooting problems.  I referred to it often when I first got started.